Magnetic car phone holders have become a popular choice for drivers due to their simplicity, strong hold, and sleek design. Whether you are using a dashboard mount, windshield mount, air vent mount, steering wheel mount, or cup holder mount, proper installation is key to ensuring stability and safety while driving.
At Dongguan Chuangjie Electronics Co., Ltd. , we specialize in designing high-quality magnetic phone holders. In this guide, we provide step-by-step instructions for different installation methods based on real usage experience.
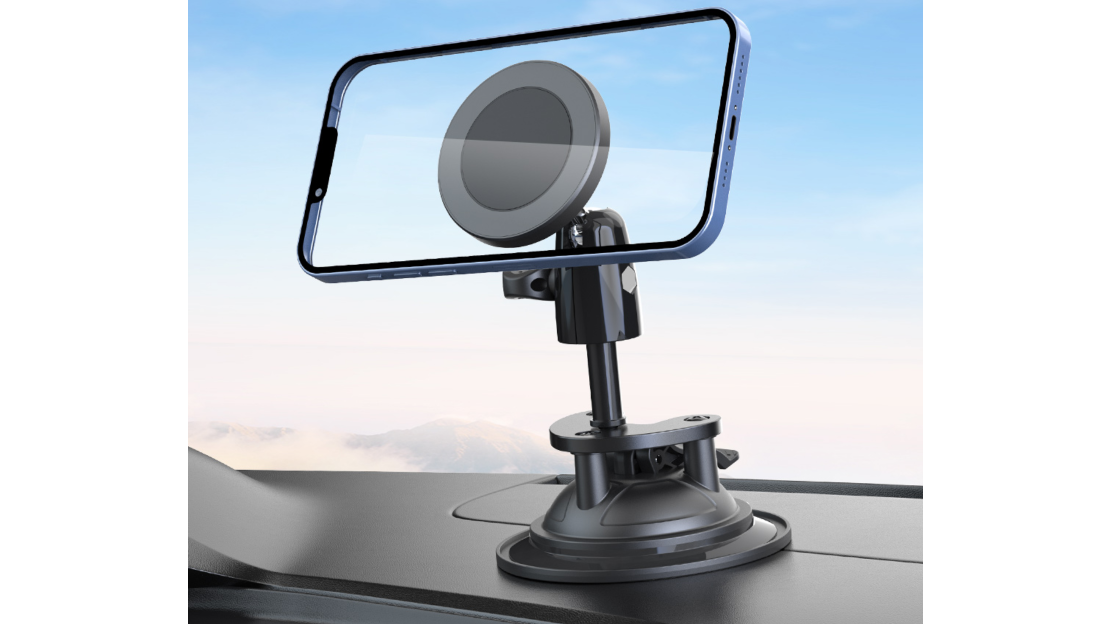
1. Dashboard & Windshield Mount(Installation methods for dashboard and windshield mounts are similar, using either adhesive base or suction cup base)
Installation Steps:
Clean the surface – Wipe the selected area on your dashboard or windshield with a clean, dry cloth. Avoid dust or grease for best adhesion.
Attach the holder – If using an adhesive base, press firmly against the surface for 1–2 minutes. If using a suction cup, press the suction base flat and lock it by flipping the lever or tightening the knob.
Insert the metal plate – Place the included metal plate between your phone and its protective case. For phones without a case, use the adhesive side of the plate directly on the back of the phone.
Mount your phone – Simply bring your phone close to the magnetic holder until it clicks into place. Adjust the viewing angle by rotating the ball head (supports 360° rotation).
Important Notices:
Avoid mounting in front of or near airbags – this can be extremely dangerous in the event of deployment.
Do not install on leather surfaces, wallpapers, or film-coated glass, as these may not provide a secure hold.
If the adhesive pad loses grip over time, clean both surfaces and reapply pressure.
Make sure the ball head rotates smoothly to achieve the perfect viewing angle.
2. Air Vent Mount
Air vent mounts are compact and keep your dashboard clean, making them a favorite among many drivers.
Installation Steps:
Insert the clip – Gently push the holder’s clip or hook into the slats of your car’s air vent. Ensure it is seated securely.
Tighten if necessary – Some models include a tightening nut or lock – rotate it to expand the rubber pads against the vent slats for a firmer grip.
Insert the metal plate – Same as above: place the metal plate between your phone and its case.
Attach your phone – Bring the phone near the magnetic head – it will snap into place.
Important Notices:
If your phone case is too thick (e.g., rugged cases), the magnetic force may weaken. Consider using a thinner case or attaching the metal plate on the outside.
If you use wireless charging, remove the metal plate before charging, as the plate may interfere with the charging field. Some newer holders integrate wireless charging compatibility – check your product manual.
3. Screen Clip Mount (Fixed on the corner of the car’s display screen)
This type of mount attaches securely to the edge of your car’s built-in center console screen, keeping your phone right next to the display without blocking your view of the road.
Installation Steps:
Choose the right position – Select a corner of your car’s screen (top-left, top-right, bottom-left, or bottom-right) that does not interfere with touchscreen operation or essential information display.
Open the clip – Gently pull or press the release mechanism to open the clamp arms of the holder.
Attach the clip to the screen edge – Slide the clamp over the corner of the screen so that the inner padded surfaces grip the edge firmly. Make sure the clip does not press on the screen’s active area or damage the bezel.
Tighten if needed – Some models have an adjustment knob or screw – turn it to lock the clamp securely onto the screen.
Insert the metal plate – Place the metal plate between your phone and its case.
Mount your phone – Bring your phone close to the magnetic head. The strong magnets will hold your phone steadily.
Important Notices:
Do not overtighten the clamp, as this may damage the car’s screen bezel.
Ensure the clip does not cover any important touch buttons or warning lights on the car’s display.
This mount is designed for most standard car screens (thickness 5–15 mm). Check your product manual for compatibility.
If your car’s screen vibrates significantly on rough roads, adjust the clip position or add the provided rubber pads for extra grip.
4. Cup Holder Mount
Cup holder mounts are ideal for larger phones or navigation devices. They utilize your car’s existing cup holder for a sturdy base.
Installation Steps:
Insert the base – Place the expandable base into an empty cup holder.
Adjust and lock – Turn the knob or twist the base until it expands and fits snugly inside the cup holder.
Position the arm – Adjust the flexible or telescopic arm to bring the magnetic head to a comfortable height and angle.
Insert the metal plate – Place the metal plate between your phone and its case.
Mount your phone – Your phone will attach magnetically to the holder.
Important Notices:
Double-check that all parts are securely tightened as per the installation manual.
For rough roads, tighten the base knob firmly to minimize vibrations.
Ensure the cup holder is clean and dry to prevent slipping.
5. Final Tips for All Magnetic Phone Holders
Clean regularly – Dust and oil can reduce magnetic hold or adhesive strength.
Check compatibility – Most magnetic holders work with all smartphones, but extremely heavy phones may require a holder with stronger magnets.
Safety first – Never mount your phone in a way that blocks your view of the road or interferes with driving controls.
At Dongguan Chuangjie Electronics Co., Ltd., we are committed to providing reliable and innovative car phone holder solutions. For more product information or custom inquiries, pls contact us.
 EN
EN